Tackling the ear

A previous tutorial during another attempt didn’t really show me how to properly create my ear. The main reason for this was because it was very low poly and didn’t give alot to work with. I tried extruding at places or push faces in to make the shape, but it looked awful! plus the topology was a mess.


I found another tutorial that was medium poly and gave a good example of how to create the ear without any three sided shapes. The image below shows how I started structuring the ear. First I made the polys go around the shape of my outer part  and ear lobe. I then did the same with the shape inside, pulling the vertices in or out to create the bone structure.

ear

This next images shows my ear in smooth view. It looks alot better and more natural than my other attempt. I was able to get the bone structure of my ear correctly. The ear in the tutorial was very different from mine and I had to use my initiative and work out the best way to do my own, but I think I achieved that.

ear 2

To make the inner part of my ear I went to the back of the head model and extruded out from there. The tutorial did the same. This way is alot easier to make sure there is quads. I had to use multi cute a few times to insure this but I think I managed to make the ear without any three sides shapes.

ear 3

After the inner part of the ear was done I extruded the surrounding loop out and up to form the side of my head. From here I can then connect the back of the head with the ear.

ear 4

Another attempt..

I say another, but this is probably my 5th attempt. I find I learn and remember things alot easier if I physically do it several times. Also the more times I do it the quicker I become and have better understanding.

I find that the tutorial I am using is very low poly and for my next attempt I would like to try a slightly more complex one, but for now I will stick to this as its easier to see the edge flow.

so with this attempt I was able to create the eyes mouth and nose. I have came across something I am not sure is an issue. In smooth view these small squares show up in random places, but not in normal view? hmm..

atempt 2what.

In this tutorial they got a sphere polygon and deleted the front faces. They then attached the vertices to the top of the head and the back of the neck to make the back skull. Not sure if this is slightly cheating but I had tried this in this attempt. It was abit frustrating trying to align up the face polys with the spheres.

Animation Feedback

After two renders and slight edits of our animation we were finally ready to show it to the class and the tutors for the first time. We showed our animation during the presentation with our research and progress.


The Feedback 

To our surprise our feedback was mostly positive. Michael Bass had started with “I have only one critique”, which really put a smile on our faces. He had mentioned that all of the learning boxes where ticked, and the only problem he could see was the pause before the girl bird comes into shot. Conann Fitzpatrick also give us positive feedback and only a few changes were needed. Yuanyuan Chen also seemed  to be happy with our animation and advised us on some small changes with lighting and timing. So I will list the different critiques  below and what we discussed as a team on how we would tackle them.

  • Camera pause – During the over shoulder shot the girl bird takes a second before she moves into scene. Michael had advised that she should have already been in the shot once the camera and changed. Also he felt that she should have came in from the left, instead of right. Conann also commented on this point. He suggested that having the boy bird in the scene wasn’t really needed, and perhaps the camera could have been in between them or his point of view.
  • Ice – The ice is a flat plane with coloured blinn texture and reflection. It was suggested that it should have marks or bumps to show that is being skated on. At the moment it looks like it has been smoothed over in a professional ice rink. We will be looking at bump map and texturing to try and making the ice more natural.
  • Character Jump – During the bird slipping on ice and falling, Conann suggested keeping him up on the air a little longer. This would give it more character and a cartoon feel.
  • Sun setting – Yuanyuan suggested making it look like the sun was setting during the animation, so at the end it would be dark (similar to the credit scene). We discussed this as a team and thought it may look a little sped up if the sun set in just 30 seconds, so we decided  to leave the lightings. She also wanted the credits to last longer to allow the characters to skate fully across the screen. The Render of the credits does actually have them going across but unfortunately we had to cut it for time. During the edit if we can spare more time for credits we will.
  • Lights on girl bird – This was not mentioned on our feedback but it was something noticed by us. The light on girl bird cast a shadow on her face and she looked a little dark, so this will be corrected.
  • More Animating – Again this was not in our feedback, but after seeing the other groups and their animations I was worried that we kept ours a little simple. I discussed this with my team and we all agreed. So instead of the girl bird coming in to wave we want her to skate in with a twirl before waving, that way there will be more animation and added character to the girl bird.

Final Presentation

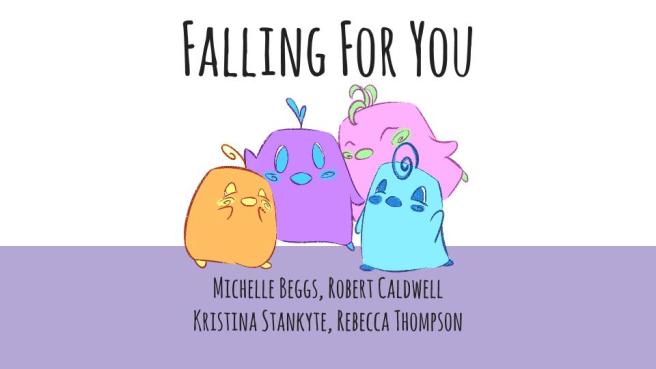
This is our final presentation that my team presented to the class and the tutors. The purpose of this was to show any changes made from the last presentation and show the finished animation. After this presentation was given we got feedback from the tutors advising us on changes we should make to our animation for final hand in.


Falling For You Final

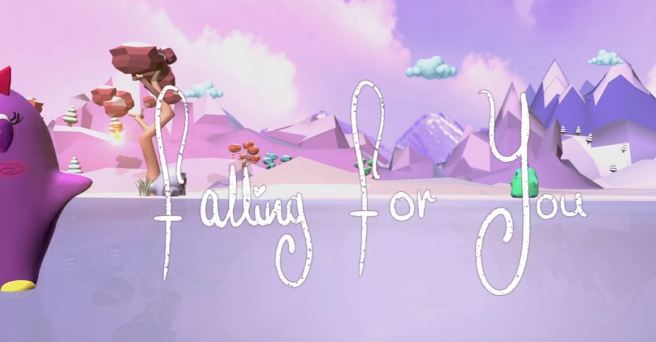
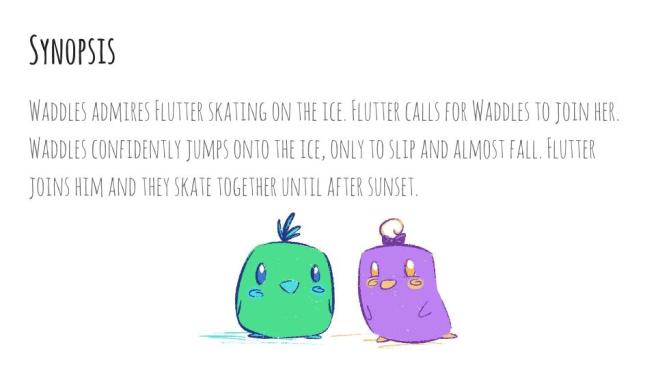
So after we showing the animation to the class we went through the slides showing research and inspirations for the final piece. After the video played we went over a quick summary of the story and meaning.

Falling For You Final (1)

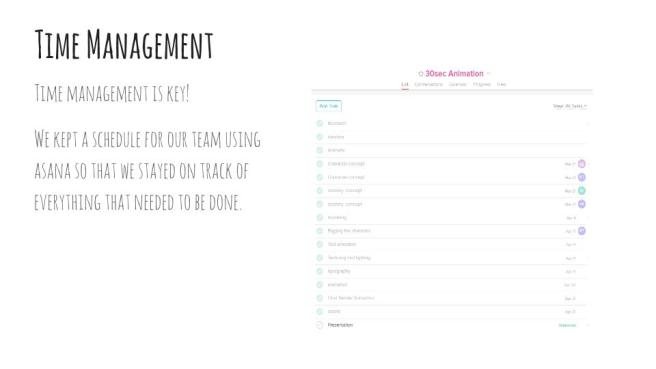
We had not mentioned about time management in our previous presentation so we decided to talk about it here. We have been using a managing software called Asana to arrange tasks to each team member with deadlines. We where able to see exactly what is due and tick off completed tasks. I think we managed to keep to this system really well as we did not go over any deadlines. In fact the date that we had planned to do the first render weeks previous, was the same date we actually did render. Because of our good time management there was no point during this task that we felt behind and rushed. We even had time to render twice before presentation to do some slight edits.

Falling For You Final (3)

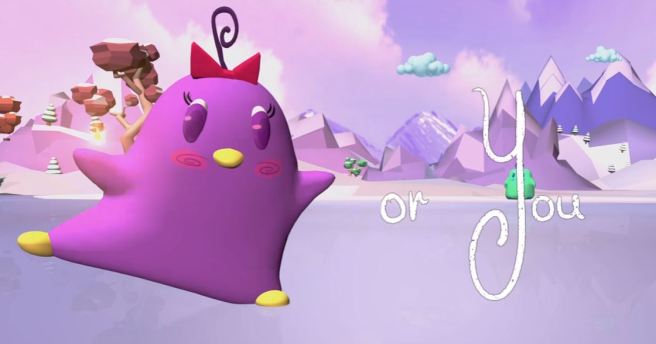
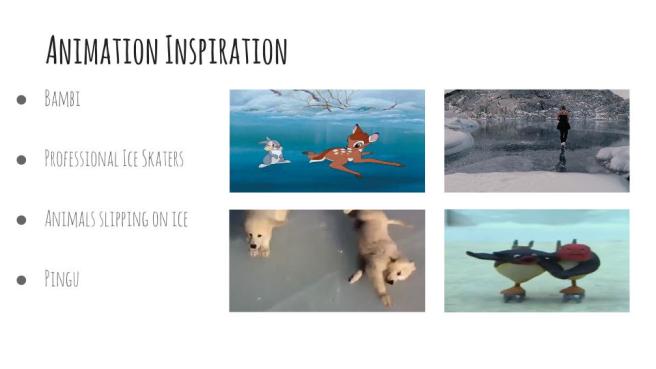
We went on to talk about inspiration. We looked at alot of skating videos to learn the proper movements of the body. Also we wanted to see how animals reacted walking on ice. We liked the example of Bambi, when he runs onto the ice with confidence and ends up falling. This is similar to our bird as he wants to impress the other, so jumps onto the ice and slips. We also looked at the different type of ice, looking at how some are very reflective and others are not.

Falling For You Final (2)

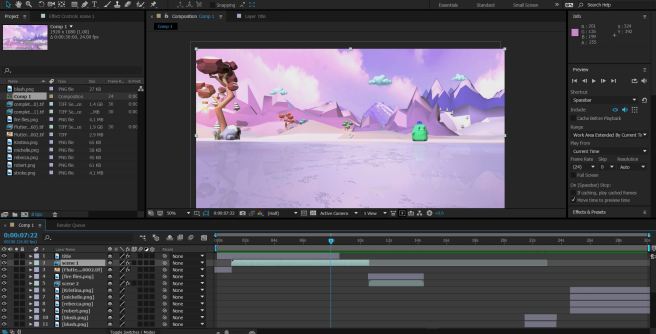
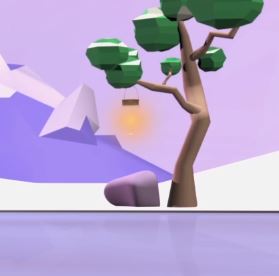
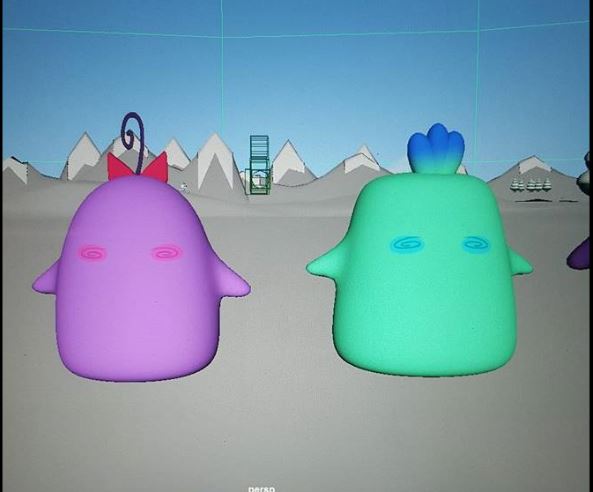
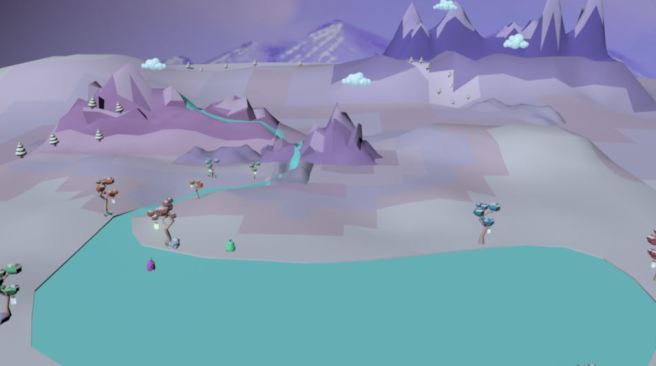
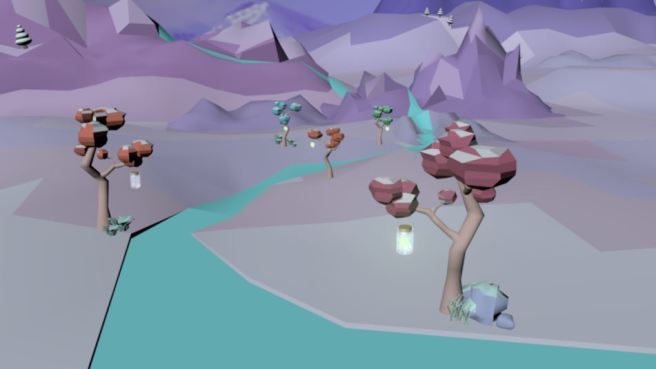
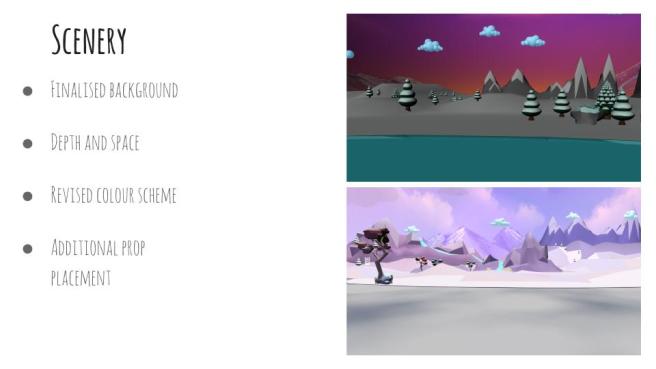
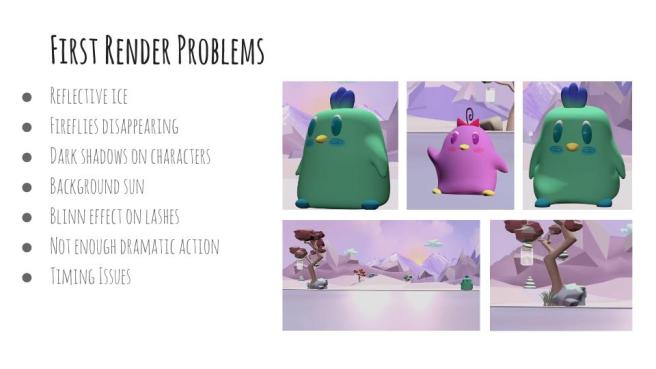
There was a big change in scenery from our previous presentation. It was always going to change and the first was just a place holder. The old scenery was very colourful and it over powered the colours of our characters. In the new scene the colours used where soft Pastel purple and pinks. This allowed the green character to pop. We also wanted more depth and space in the new scene. We accomplished this by making the set more uneven with various mountains. Another big change was the position of the sun. We originally wanted to see the sunset in the background. In the first render the lights were set to show this naturally. We were not happy of the shadows that appeared on our characters faces because the light source is behind them. To correct this we put the sun on the other side, shining on their faces.

Falling For You Final (4)

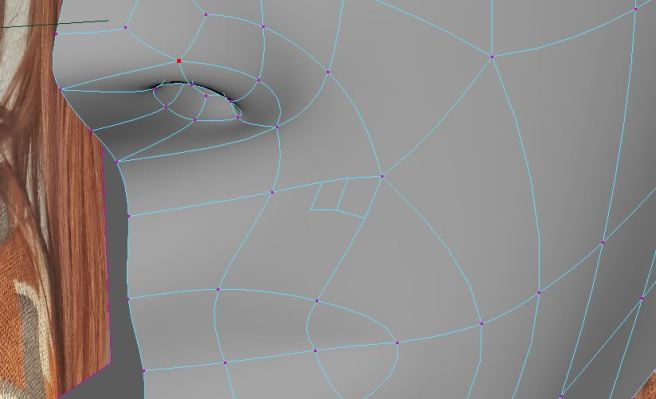
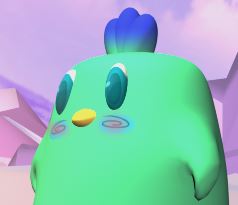
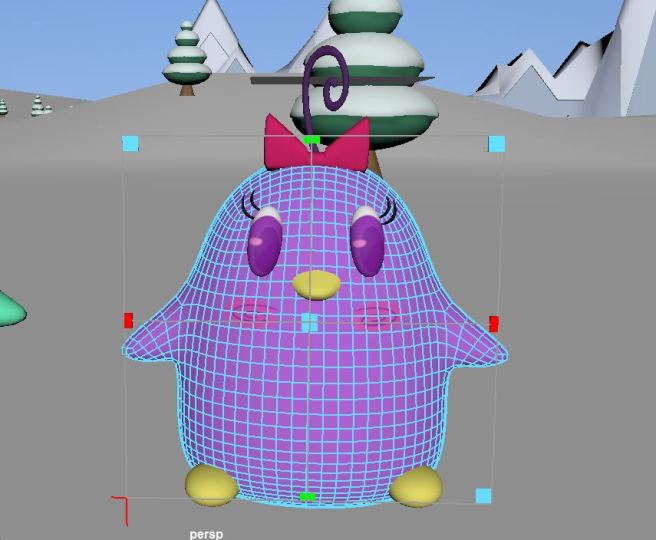
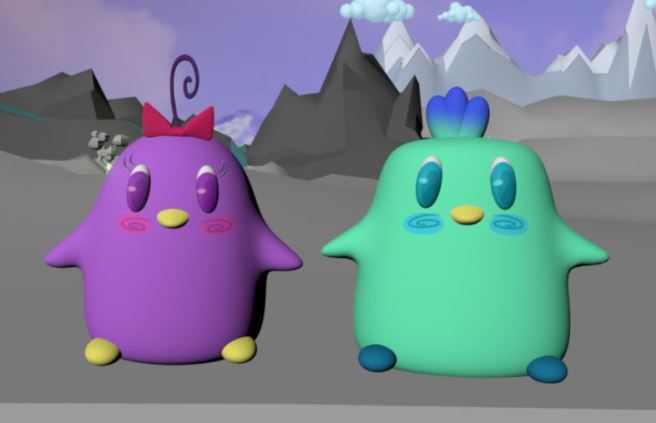
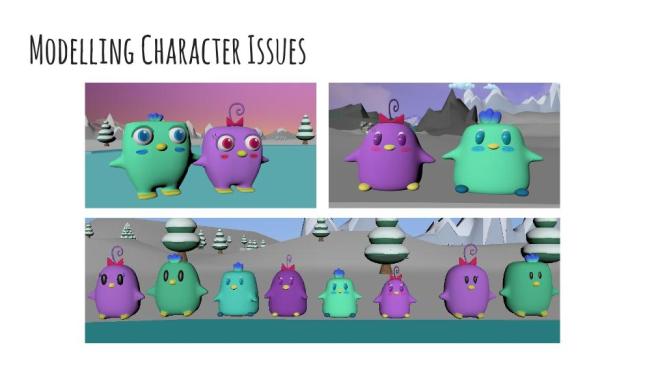
The character design was a big change. I found that it is very easy to allow the software to control the design of our character. Also because I was very new to Maya modelling I took several attempts to finally get the birds right.

Falling For You Final (5)

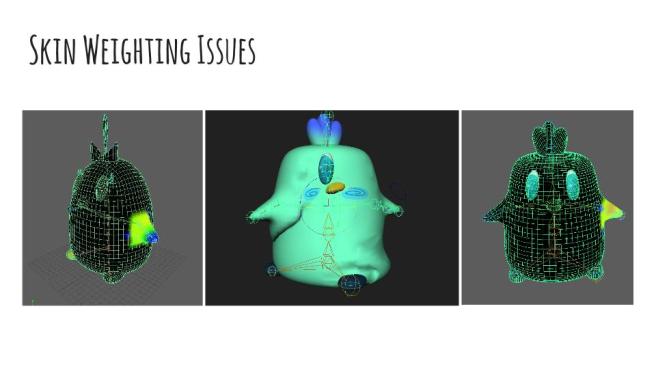
Another task that was completely new to all of us was rigging. Rebecca had a little experience and she took on the job. Unfortunately she ran into trouble when it came to adjusting the skin weights when moving the rig. We ended up  tag teaming it, she did the boy bird I did the girl, and eventually with alot of tweaking we got it right. This probably took the longest to do, but we got there in the end.

Falling For You Final (6)

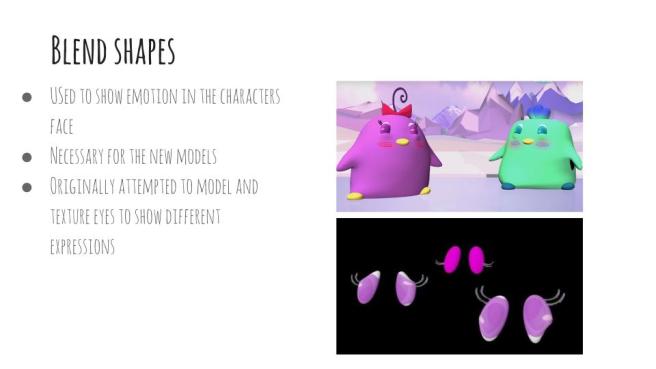
Another problem we ran into was using the blend shapes. The puffing chest worked ok but our original idea was to use them for the eyes. The bird eyes are textured with features like pupils and high lights. We did not realise that when we moved the shape of the eye the texture would squash and stretch too, and it looked terrible. We came up with a solution to extrude the body shape up over the eyes like eye lids. The downside to this is we could only move their eyes at the very end when their final position was non moving.


Falling For You Final (7)

So from our good time management we were able to render twice. The reason we did it again was to edit a few things we were not happy about. This included the lighting, the lack of character in the birds movements, the lights reflecting on the ice, timing issues etc. There was a couple of other tweaks we wanted to do but thought it would be best to wait until the 2 weeks for final hand in, since it will need rendered again anyway.

Falling For You Final (8)

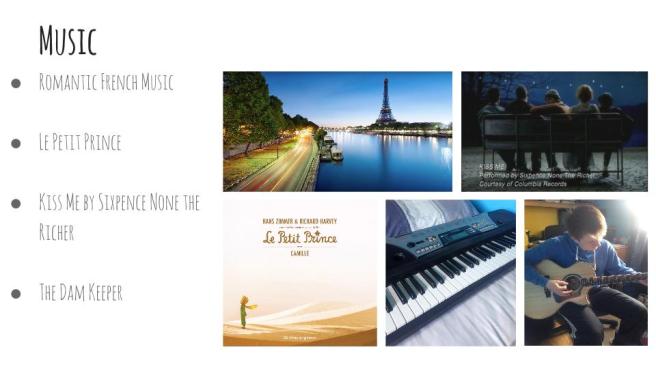
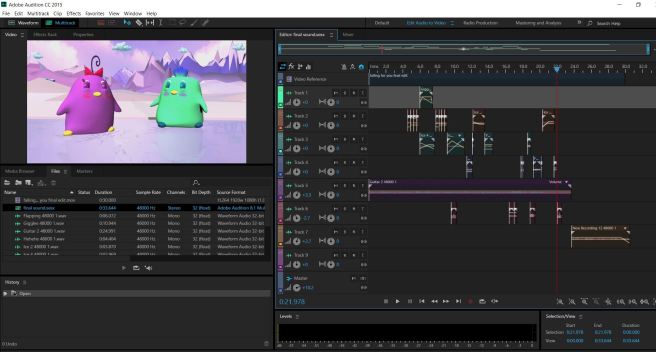
So we wanted our animation to be made entirely by us and from scratch, this included the music and sound effects. We did a little research on Foley effects and how they are used in films, tv and games. We thought we would be able to create sounds for the scraping ice, wings and voices. I did the voices for the birds (yes its extremely girly). The ice sound was created by scissors moving along metal. The wing flapping was Robert slapping his leg. We added images in the presentation to show us working on that. The music was made by Roberts brother Billy Caldwell. He listened to a couple of songs we liked the sound off and played the guitar from ear. Thanks for that Billy!

Falling For You Final (9)

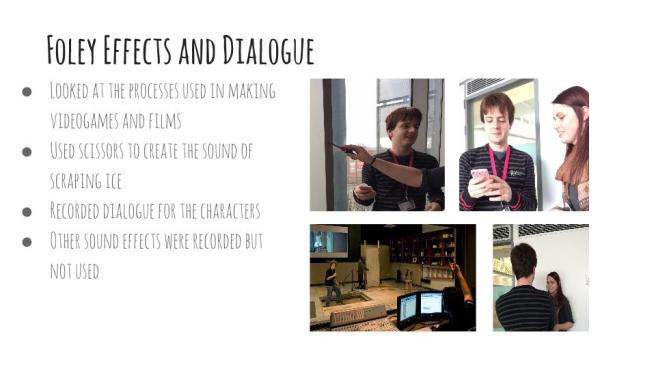
For the presentation we mentions some of the songs we listened  too and also added images of Billy playing the guitar and the keyboard that Robert experimented on.

Falling For You Final (10)Falling For You Final (11)Falling For You Final (12)

Rendering From Premiere

Once the soundtrack was finalised and exported as a WAV, and the scenes were edited and exported from After effects, I brought them both into Adobe Premiere. Here I was able to quickly render them out together. Because I had already matched the sounds up in Audition I did not have to waste time to tweak the timing.

using premiere.JPG

From here I adjusted the render settings before exporting it. I made sure that the format was H.264, which is HD and the quality was at its highest. Also the width and height was 1920 by 1080 and the frame rate was 24. Once everything was in order I exported the scene.

render options

Some photos of us trying to get the timing right and getting the animation ready for final render!


The finished video is now up on YouTube!

Editing in After Effects

After the frames were rendered from Maya I brought the images into After Effects and exported them as a Tiff sequence. This meant that After effects automatically imported them as one completed scene. From here we where able to do some editing. We rendered the scenes in four parts

  • Scene 1 – Establishing shot, camera panning down before zooming into the boy bird.
  • Scene 2 – An over shoulder shot of boy bird looking at girl, who waves to him
  • Scene 3 – Boy bird attempts to jump on ice, only to slip
  • Scene 4 – Credits. Boy and girl bird skating together

after effects

The colour of the rendered scene was a little bright and we wanted to darkening it down slightly. I did this by using the effects and adjusting the curves. I kept the same curve adjustments on all scenes so that they matched.

curves

Another effect that I used was the Linear Wipe. This was added to the Main title. When the title comes down to the ice the girl bird skates across the screen. We wanted to words to vanish as she was doing this. The effect allows the words to ‘wipe of the screen’ at a certain time and angle. We keyed the effect to happen just as the bird goes past, the images below show this.

title wipewipewipe 2

Another adjustment we wanted to add was the cheek blushes on the boy bird. This would give him more character and emotion, telling the audience that he is feeling bashful around the girl bird. The blushes where made in Photoshop and saved as a PNG with no background. I then set the opacity to fade in and out when needed.

blush

We noticed  the jar behind the girl bird had no glow. To fix this flaw I did the same as the blushes, and made a glow in Photoshop. Placing it to look like it was in the jar.

fre flies

The text for our names in the credits and the title was drawn by Rebecca. She saved them as  a PNG with no Background. Once they were in the correct positions I was able to fade them in and out when needed.

credis


Editing Sound effects

We wanted to create everything for this animation from scratch, this includes the sound effects and background music. For the sounds such as skating on ice, wind and voice effects, we looked at foley effects.

During film the only thing that they record is the voices of the actors. The other sounds are recorded afterwards, usually in a room filled with all sorts of objects. They watch the scene and use the objects to recreate the sound. For example a horse galloping could have coconuts hitting together. The likes of punching noises, doors slamming and glass breaking would all be recording in that room. They are then matched up to the scene.


We had a go with our own foley effects. We used scissors scraping on metal to get that ice scraping sound and hit objects for the wing flapping sound. I also did the voices (extremely girly I know) Here is some photos we took during the process

Roberts brother, Billy Caldwell was kind enough to lend his music talents and play his guitar for the soundtrack. Thanks Billy! Robert also had a go playing the keyboard.


For editing the sound effects I have some experience in Adobe Audition. I thought this was best because  I was able to bring in our animation video to match up the sounds correctly. We only had a couple of sounds for the ice scrapping and I had to cut and mix them up. I used the volume and panning left and right whenever the characters moved around the screen to make them sound natural. The two guitar songs were also added using Audition. From there I exported the soundtrack as a WAV file to import into Adobe Premiere.

audition

Texturing

The majority of scenery has been coloured using the default colours in Maya but there are several things that had textures imported. These conclude

  • Boy Hair
  • Girl Eyes
  • Boy Eyes
  • Bodies
  • Background

We wanted the birds to have little blushed cheeks. We took a UV snap shot of  the front of the bird model and brought it into Photoshop. There we where able to map our exactly where we wanted the blushes to be on their face. Below is the image created on Photoshop.

bird texture

It was then imported into Maya as a texture. using UV Planar we where able to adjust the texture where needed.

adding texture

Problems 

One of the problems we ran into is the texture lapped around the model and the blushes where on their black. To correct this we selected the effected faces and used the UV editor to move the blushes of the back.

texture fail

Final scenery

The final scenery has been based on a concept that was created by kristina in the begining. We loved the use to pastel colours on the trees and mountians, giving it a fantasy feel

finished


finished scenery


Fire Flies

We wanted to make this place feel magical. With only nature and not really touched by human technology. Instead of a lamp, we thought it was a nice idea to have fire flies in a jar hanging from the trees. They would give off a soft glow that would add to the romantic atmosphere. The fire flies where created using particles on Maya. The yellow colour was added with the glow.


fireflies

Frozen waterfall and lake

In Kristina’s concept there was a frozen waterfall that we wanted to keep. The water fall is part of a river that is seen in the distance. It then goes over a mountain and down to create the frozen lake which will be our set.

scenery 1