Final Animation Edit

So after taking the Feedback on board and editing our animation we are pleased to have completed our very first short “Falling For You”. I am so happy with what we have accomplished and how everything went so well in the making off it. My team have been brilliant and I hope we will be able to work together again in the future to create more animations!

team-picture.png

Waddles Jump

Part of the feedback was making Waddles stay in the air a little bit longer. Conann had mentioned looney toons and we thought that Coyote and the Road runner was a good example of exaggerated falls. Every time he falls off a cliff he would have a moment of realisation that he is about to fall, and have time to wave goodbye or hold up a sign. This of course would never been possible in real life, but it is in cartoons!

wile-e-coyote-falling-off-cliff.jpgImage Link 

Although Waddles is not falling from a huge height we can still exaggerate his fall slightly. Keeping the time in mind, Rebecca animated the bird to stay in the air longer, making him go up higher aswell.

fall

Flutters Twirl

Flutter, the girl bird was given a little more animation in edit. This was because we wanted to add a little character and more movement. Kristina and Rebecca worked on the twirl with Robert and myself giving suggestions. Robert had also made a previous attempt using a curve motion path. Kristina had researched the move by looking at figure skating. She came across a video with a step by step guide on how to do the jump.


Using this guide they where able to create a similar move with Flutter. As she is a bird we thought that it would be nice to have her flap her wings on the down fall, allowing her to land softly. We did this because we did not want her to skate too far off the screen, if she had of landed on her full weight she would have skated further back.

Part of the Feed back was ensuring that the girl bird comes in from the left of the screen. We also made sure that the timing was accurate. The girl skates past the boy close enough to make wind blow on him, so the camera changed almost instantly after she had past. The image below is the girl bird already on the screen the minute the camera changes. Also the camera is now on the boy birds point of view. We had set the camera directly infront of the bird and at his eye level to ensure it was believable.

twirl 3

Flutter twirls around at the highest part of her jump. She is a bird and light in weight, so she is able to jump higher than a human figure skater. During her downfall she flaps her wings, slowing her descent and allowing her to land gracefully. Once she lands she waves over at Waddles.

twirl 2twirl

Slight Tweak

Just before hand in I was advised that my cheek topology was a little stretched.To fix this I added two more edge loops around the face. This also allowed me to adjust the cheek bones for more likeness. The image below shows the old and new head models. The right head has the adjusted cheek.

change


I am fairly happy with the finished result. When I started this task I was overwhelmed and thought it was very complexed. After the several attempts I become more confident and understood how the edge flow works. The most difficult part of this task was probably getting the head and neck shape right and connecting the ear to the head. Here is an image of the completed head model in different angles:

complete

Completed Head Model

For the last part of adjusting the head model I had to look more in the mirror than use the references. In the front reference my head is slightly tilted upwards and to the side, making some of my features lope sided. I spent alot of time on my nose trying to get it to look exactly like my own. I was having trouble with getting my top lip to look thicker without going too far out of my reference photo. Below is turn around images of the head in smooth.

allfull 1

Below is an images of the model front and side not smoothed. I had to adjust the back of the head more to follow the references. I had to guess a little for the neck because I was wearing a scarf in the picture.

I tried my best to keep to the references, especially the side image, The front had to be a little different because my head is tilted but its still fairly accurate. The two images below show this.

The image below shows the similarities with my head model and photo reference. I noticed that my eye socket is very inset and I tried to get that in the model. Also the dip in my nose. I wanted to get my cheek indents around the mouth laugh line and also the cheekbones, which slightly protrude just below my eye.

4

Experimenting with ice

Part of the feedback included changing the ice. Our original ice was clear and smooth, almost like it was professionally done in an ice rink. To make it more natural we experimented with bump map using a fractal texture. We adjusted the settings and rendered the scene out to pick which one was the best. We tried frost looks, watery looks and even lines. We tried lines because they are skating on the ice which would leave some markings. However as a team we decided to not have lines as they arnt actually skating with skate blades. Also we just didn’t like the look of it.


bump 2ice bump mapice bumplines on ice

Here is the final ice texture that we settled on. The bump map is scattered throughout which mixes up the smoothness. It is not too much that looks like it may crack. Also we didn’t want too much texture or the reflection on the ice would be lost.

final ice.JPG

Almost there..

After the other half is combined and I made some tweaks it is finally looking like a human head. I am finding it hard to see any resemblance of me but I will keep working out it. Perhaps it is weird seeing my head and face without hair or eyebrows?

So far I am pretty happy with the shape and topology. I still want to adjust the head shape and give more detail around the eyes and mouth.

almostalmost 2

Fixing the nose

So after the other half was combined I noticed that my nose was way too wide. The part in between my nostrils was too big, as you can see in this image below.

too big nose

To fix this I moved to edges closer together and adjusted the nostrils. I did the same on the bridge of the nose to make it thinner, like my own. Below are two images of my nose not smoothed and smooth.

nose fix 3nose fix

My nose goes down in a dip on the bridge that I made sure to keep in the model

nose fix 2

Combining

So after I was happy with one side of my head it was time to use ‘Duplicate Special’ which mirrored the other half.  I then had to carefully go along the middle and merge the vertices together. This part was very time consuming as the back of the head bent inwards in the middle and gave me a weird brain shape. After fixing this I soon realised there was a lot of adjusting needed. My nose looked way to wide aswell as my mouth. I don’t have a very symmetrical face so I knew I would need to work on that.Also I have a man chin here!

combined

Tackling the ear

A previous tutorial during another attempt didn’t really show me how to properly create my ear. The main reason for this was because it was very low poly and didn’t give alot to work with. I tried extruding at places or push faces in to make the shape, but it looked awful! plus the topology was a mess.


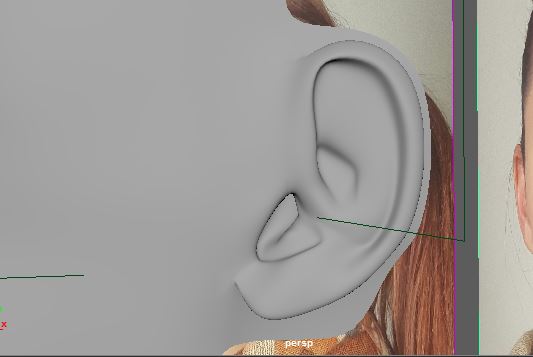
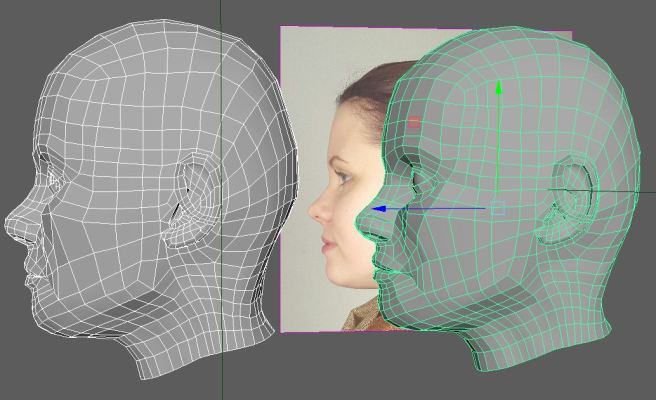
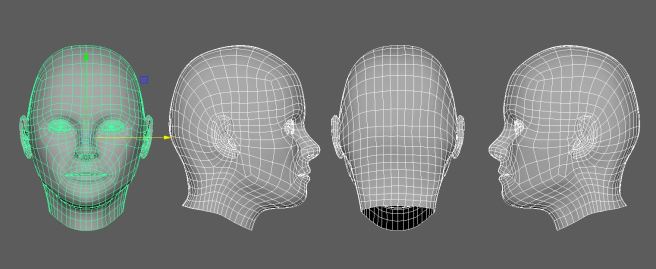
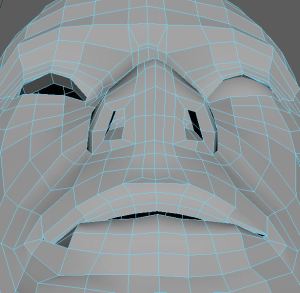
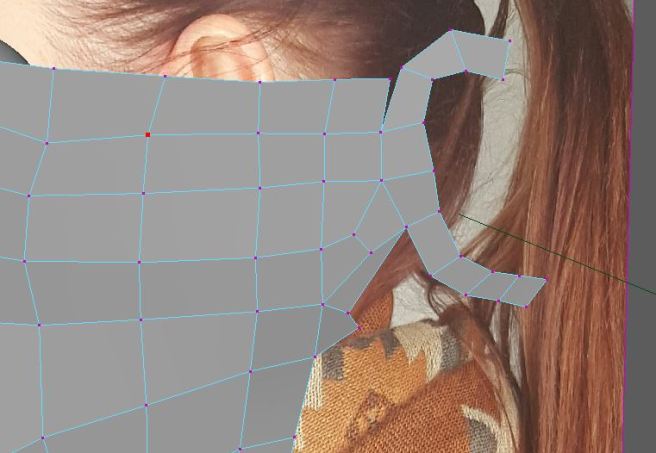
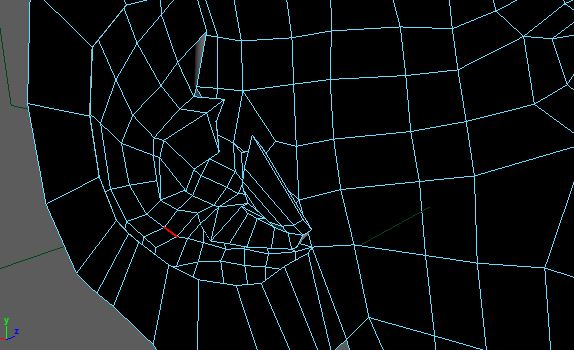
I found another tutorial that was medium poly and gave a good example of how to create the ear without any three sided shapes. The image below shows how I started structuring the ear. First I made the polys go around the shape of my outer part  and ear lobe. I then did the same with the shape inside, pulling the vertices in or out to create the bone structure.

ear

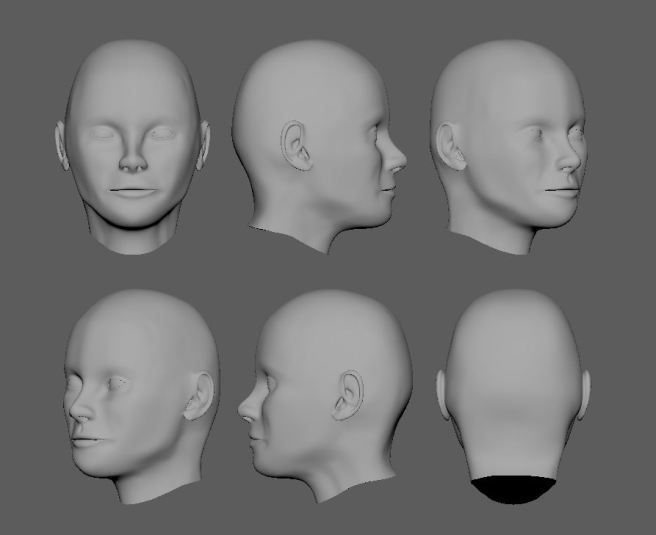
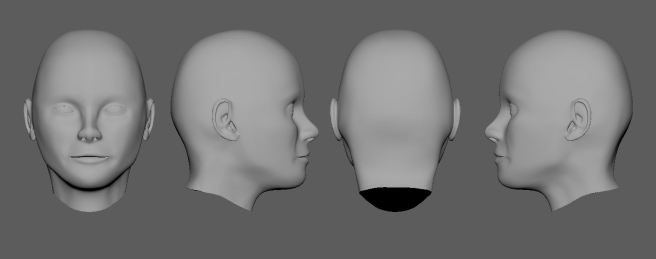
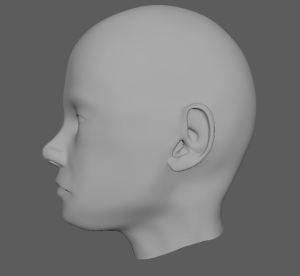
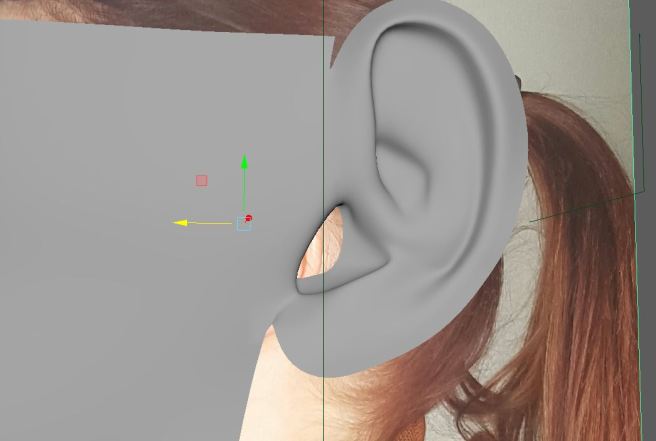
This next images shows my ear in smooth view. It looks alot better and more natural than my other attempt. I was able to get the bone structure of my ear correctly. The ear in the tutorial was very different from mine and I had to use my initiative and work out the best way to do my own, but I think I achieved that.

ear 2

To make the inner part of my ear I went to the back of the head model and extruded out from there. The tutorial did the same. This way is alot easier to make sure there is quads. I had to use multi cute a few times to insure this but I think I managed to make the ear without any three sides shapes.

ear 3

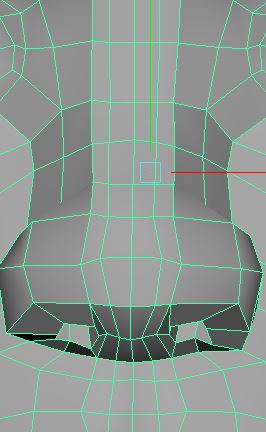
After the inner part of the ear was done I extruded the surrounding loop out and up to form the side of my head. From here I can then connect the back of the head with the ear.

ear 4